


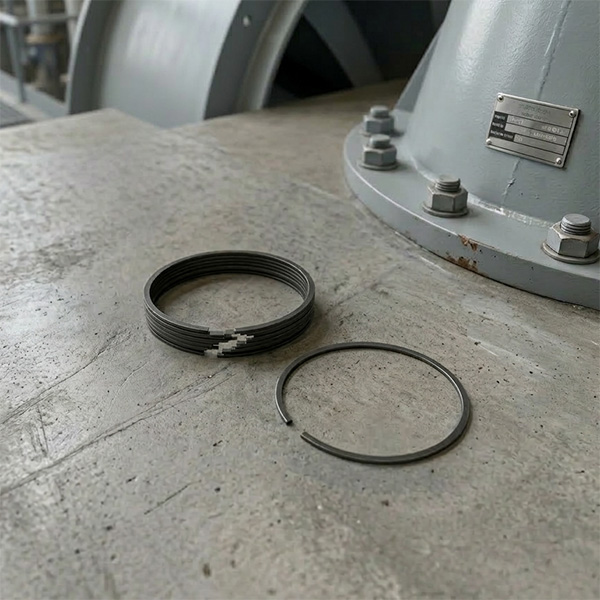
Pump Casing Cover Nut FA1D56-03-18: Never Fail Your Booster Pump Overhaul
In the overhaul of the FA1D56 booster pump at power plants, technicians often encounter frustrating issues: a newly replaced mechanical seal leaks within days of operation, or the tightly secured casing cover exhibits excessive vibration upon startup. After extensive checking, the problem is sometimes traced back to a tiny nut. This nut is the FA1D56-03-18 Booster Pump Casing Cover Nut. Although it only fastens the cover, it directly impacts the pump's sealing effectiveness and operational stability. Today, we'll discuss the maintenance essentials for this critical small component, teaching you how to select and install it correctly to avoid costly detours.
I. Understanding the Component: This Nut is "Tailor-Made" for the FA1D56 Booster Pump
The FA1D56-03-18 is not a generic nut for any booster pump; it is specifically designed for the FA1D56 pump. Its thread specification is M24, perfectly matching the mounting holes of the pump shaft FA1D56A-01 and the free end bearing housing FA1D56-02-08. It serves two core functions: first, securely fixing the booster pump casing cover to the pump body to prevent rotor assembly wobble; second, working with sealing components to ensure no medium leaks out of the pump.
One power plant tried to save time by using a common M24 nut as a substitute. After less than three months of operation, the nut experienced creep—the threads loosened—due to the booster pump's high operating temperature (consistently near 160 degrees C). This led to slight displacement of the casing cover, causing the mechanical seal to leak. This highlights the importance of the dedicated part: the FA1D56-03-18 is customized for the FA1D56 pump's operating conditions, which generic nuts simply cannot withstand.

II. Three Technical Advantages Make It the "Trusted Choice" for Overhaul
Why can the FA1D56-03-18 withstand the rigorous operating conditions of the booster pump? Its technical design directly targets the pain points faced by power plants, with every feature being practical.
1. 35CrMoA Steel Material: Temperature-Resistant and Robust, Resisting Breakage
This nut is made of alloy structural steel, treated with 850 degrees C quenching + 550 degrees C tempering. Simply put, it has "good bones": it resists deformation at temperatures up to 500 degrees C, making the booster pump's operating temperature an easy task. It also boasts high strength, resists thread stripping during tightening, and won't break off in the hole due to vibration during operation—a broken nut inside the pump body is far more complex to remove than to install, often requiring half a day just for tool retrieval and thread cleaning.
2. Rolled Threads: Smooth Tightening, More Reliable Sealing
The threads are manufactured using the rolling process, not standard cutting threads. Technicians immediately notice that these threads turn very smoothly without sticking. The thread surface is also smooth (roughness Ra less than 1.6 micrometers), meshing tightly with the shaft nuts FA1D56A-01-12A and FA1D56A-01-08A, leaving no excessive gap. This reduces wear caused by vibration and prevents gradual loosening over time.
3. Phosphating Treatment: Remains Rust-Free Even in Storage
Power plant spare parts warehouses can be humid, and standard nuts may rust after six months, requiring time-consuming rust removal before overhaul. The FA1D56-03-18 is surface-treated with phosphating, forming a protective film. Even if stored for a year, it remains clean and ready to use, saving significant time during emergency repairs.
III. How to Use in Overhaul? Three Scenarios to Remember
The FA1D56-03-18 is mainly used during major, minor, and emergency repairs of the booster pump. Each scenario has specific installation procedures; incorrect use can easily lead to problems.
1. Major Overhaul: Replace with Complete Set, Adhere to Torque Range
During a major overhaul to replace the mechanical seal (e.g., LTJ-8B1D-FA1D56/M106D SiC) after disassembling the casing cover, you must replace the old FA1D56-03-18 nut. This should not be done in isolation—it must be replaced along with the associated parts: the flat washer FA1D56-03-21, the spring washer FA1D56-03-24, and the lock washer FA1D56A-01-11.
Torque is critical during tightening: it must be controlled between 180-200 N·m as specified in the FA1D56 booster pump maintenance manual. Too little torque means the casing cover won't be tightly compressed, causing the seal to leak. Too much torque can cause the threads to "seize up," potentially leading to breakage during the next disassembly. One plant technician over-torqued to 250 N·m, and during the next overhaul, the nut couldn't be removed, forcing the team to remove the entire pump shaft, adding a full day to the schedule.
2. Emergency Repair: Avoid Old Nuts, Check Associated Parts First
If the booster pump suddenly leaks and the cause is identified as a loose casing cover, a brand new FA1D56-03-18 must be used for emergency repairs. Do not attempt to simply re-tighten the old nut, as it may have already suffered fatigue deformation and is likely to break upon reuse. During the rush, quickly inspect the associated washers for damage; if a washer is cracked, replacing only the nut will not stop the leak.
3. Routine Inspection: Listen for Noise, Check Oil Level, Catch Problems Early
During routine inspections, if you hear an abnormal "buzzing" vibration near the casing cover or observe an abnormal drop in the bearing housing oil level, immediately check the tightness of the FA1D56-03-18. If the nut has loosened, re-tighten it to the standard value using a torque wrench to prevent a small issue from escalating into a major failure.
IV. Associated Parts List: Don't Forget These Components When Replacing the Nut
The FA1D56-03-18 must work in conjunction with the parts below to function effectively. These should be inspected and replaced together during overhaul. The table clearly outlines them for technicians' reference:
| No. | Spare Part Model | Spare Part Name | Synergy with FA1D56-03-18 Nut | Maintenance Notes |
|---|---|---|---|---|
| 1 | FA1D56-03-21 | Flat Washer | Distributes the nut's tightening pressure, preventing the nut from damaging the bearing housing contact surface. | Must use the same model; do not substitute with generic flat washers. |
| 2 | FA1D56-03-24 | Spring Washer | Counteracts loosening caused by vibration, aiding in anti-loosening. | If the washer is deformed or has lost elasticity, replace immediately. |
| 3 | FA1D56A-01-11 | Lock Washer | Forms a dual anti-loosening mechanism with the nut, preventing thread loosening from prolonged vibration. | Must align with the nut's keyway during installation to ensure proper locking. |
| 4 | FA1D56A-01-12A/08A | Shaft Nut | Works with the casing cover nut to position the pump shaft and ensure rotor concentricity. | Tightening sequence: Shaft Nut first, then Casing Cover Nut. |
| 5 | LTJ-8B1D-FA1D56/M106D SiC | Mechanical Seal | Nut tightening ensures the seal receives the correct pre-compression amount. | After torquing the nut, check the sealing face for any leakage. |
| 6 | FA1D56-02-08 | Free End Bearing Housing | The nut's primary fastening target, ensuring the bearing housing seals tightly against the pump body. | Clean oil and contaminants from the bearing housing contact surface before installation. |
V. Final Reminder: Choosing the Right Supplier Prevents Costly Mistakes
Many technicians believe "a nut is a nut," but this is incorrect. A slight difference in the quality of the FA1D56-03-18 can multiply subsequent repair costs. It is advisable to choose a professional spare parts supplier like Dongfang SRI. They not only provide standard-compliant nuts but can also supply the complete set of associated parts—washers, lock washers, etc.—preventing the need to source from multiple vendors and avoiding dimensional mismatch issues between different brands.
For instance, one power plant bought nuts and washers from different sources, but the washer was too thick, preventing the nut from being fully tightened, which led to a persistent seal leak. The issue was resolved only after switching to a complete set of parts from a single supplier, which installed correctly on the first attempt and has run without issues for nearly two years. Factoring in downtime losses, choosing the right spare part can save significant annual maintenance and outage costs.
In summary, the FA1D56-03-18 is a "key player" in booster pump overhaul despite its small size. Remember these three points: "Use Dedicated Parts, Ensure Complete Sets, Control Torque," and your booster pump will run more reliably with fewer faults. The next time you encounter a casing cover issue during overhaul, start by checking this nut—it might just be the source of the problem!
HKCYT-2025-10-31


-
Looking at Abnormal Wear on U250-Y01 Induced Draft Fan Moving Blades
Understand why U250-Y01 induced draft fan blades wear out and how to maintain mechanical linkages. We provide U250-Y01 blades, seals, and connecting rods.03-23
-
Easy Maintenance with the SDGLQ-60T-36K Duplex Oil Filter for Coal Mills
Learn how to switch the SDGLQ-60T-36K duplex filter element without stopping your coal mill. No oil flow interruption, stable pressure, and zero bypass. Get a quote today.03-17
-
Keeping Your ID Fan Safe with the U2616G2106Y01 Blade Seal Ring
Protect your HU25042-221G fan with the U2616G2106Y01 blade seal ring. Learn how multi-stage sealing prevents bearing jams, blade sticking, and fan stalls.03-12
-
Stopping Oil Leaks with the UYG35/20G010 ID Fan Seal Ring
Stop bearing box leaks with the UYG35/20G010 ID fan seal ring. Learn how gap control and thermal expansion prevent grip failure in induced draft fan spare parts.03-11
-

How to Detect Micro Leakage in Feed Water Pump Gasket FA1D56-03-09 Before It Causes Shutdown
Learn the common failure modes of feed water pump cooling water jacket sealing gasket FA1D56-03-09, including aging, creep relaxation, and mechanical damage. Understand external signs, micro leakage detection methods, and practical maintenance tips to prevent pump shutdown and reduce repair cost.03-02


