


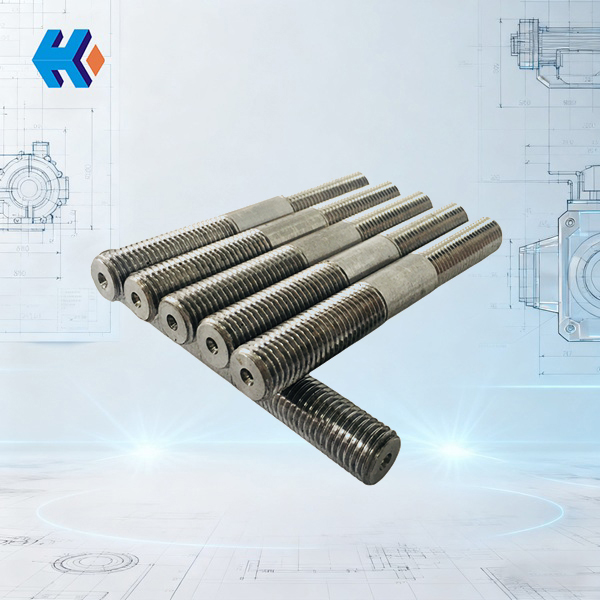
The Pump Cover Keeps Leaking? Check Your FA1D56-03-19 Studs and Hardware!
Power plant mechanics fixing an FA1D56 feedwater booster pump often hit a frustrating wall: You swap out the old seal, put the cover back on, but the system keeps weeping fluid. The seal might not even be the problem. The real culprit? That specific FA1D56-03-19 double-ended stud holding the cover. Did you install it correctly? Are you using the right matching nuts and washers, or did you just grab whatever was handy?
This little stud is not just any fastener. It's the essential "keystone" for a perfect cover seal. One wrong step, and all your hard work is wasted.
I. Understand This: It is A Exclusive Piece for FA1D56 Pump
The FA1D56-03-19 stud bolt isn't generic. It's purpose-built, made only for the FA1D56 booster pump. Its task? Just one thing: Lock the pump cover down tight to the main body. This pressure on the seal, that's what matters. Keeps the boiler water, or the deaerated stuff, from leaking out.
Never underestimate its role. The pump operates under significant pressure. If the stud loosens, or if it doesn't align perfectly with the cover hole, the sealing face will lift. Media streams right out of the gap. Best case: you have a messy cleanup. Worst case: you need an emergency shutdown. One plant once tried to save time using generic studs; the pump leaked within two weeks. When they inspected it, the bolts were already deformed. A whole new set of seals wasted.
II. Installation Mistakes to Avoid: 3 Steps That Cause Leaks
Simply threading the FA1D56-03-19 stud in won't cut it. You must follow a precise procedure.
1. Inspect Before Installing: Don't Use a Flawed Part.
Before putting in a new stud, check it over:
- Threads: Look for stripping or deformation.
- Surface: Any rust? New studs are factory-treated for rust; they should be clean and shiny.
- Cleanliness: Feel for grease or metal shavings. Contaminants prevent proper tightening and could score the cover’s mounting bore.
If you're reusing an old stud after maintenance, inspect it carefully. If the threads show more than 1/3 wear, or if you spot any hairline cracks, do not reuse it. Replace it immediately.
2. Torque Matters: Don't Just Use Your "Hand Feel."
Check your FA1D56 maintenance manual. The typical tightening torque is around 180-200 N·m (check your specific plant's documentation for any minor revisions). Never rely on guesswork. The mechanic who thinks "tighter is safer" risks snapping the stud or stripping the cover’s threaded hole. Too loose, and the seal won't compress—it will definitely leak under pressure.
Use a torque wrench. Tighten in two stages:
- First stage: Pre-tighten to 80 N·m.
- Second stage: Apply the full rated torque.
3. Tighten Symmetrically: Keep the Pressure Balanced.
You have multiple studs on the cover. They must be tightened in a cross-pattern sequence—for example, top-left, then bottom-right, then top-right, then bottom-left, cycling around until all are tight. Random tightening will "warp" the cover. The sealing face will have uneven pressure, leading to an inevitable leak. I once helped a plant with a severe leak right after assembly. We re-torqued everything using the correct symmetric pattern, and the leak stopped instantly.
III. The Hardware List: Stop Mismatching Parts!
The FA1D56-03-19 stud needs its dedicated team of complementary parts to function correctly. Leaks often happen because mechanics substitute generic nuts and washers. The wrong materials won't compress the seal correctly and will quickly fail. Use this table as your guide:
| Part No. | Part Name | Function | What NOT to Do |
|---|---|---|---|
| FA1D56-03-20 | Double-Ended Bolt | Works with FA1D56-03-19 to distribute cover pressure evenly. | Mix and match different bolt types or lengths. |
| FA1D56-03-18 | Cap Nut | Secures the stud and locks the pre-load tension. | Use standard carbon steel nuts; they rust and seize easily. |
| FA1D56-03-24A | Washer | Spreads the nut's load, protecting the cover's surface. | Skip the washer or use a thin, generic piece of iron/steel. |
| FA1B56-A3-103403 | Thrust Disc Lock Washer | Secures associated components, preventing loosening from vibration. | Use a standard flat washer; it won't offer the necessary locking feature. |
Example: The FA1D56-03-24A washer is typically copper. Its specific hardness allows it to subtly deform and fill minor imperfections on the sealing face, blocking the leak path. A hard, common iron washer will not conform and may actually scratch the cover, causing a worse leak.
IV. Built to Last: The Stud's Durability Advantage
This stud isn't a superior choice because of hype; its material science and processing are designed for power plant demands:
- Tough Material: Made from high-strength alloy steel, it resists extreme tension and compression. It can handle the high vibration of a booster pump far better than standard bolts, often lasting more than twice as long.
- Temperature Resistant: It undergoes a "quenching and high-temperature tempering" process during manufacturing. This keeps it from becoming brittle in cold plant environments and prevents deformation from high pump body heat, maintaining consistent tightness.
- Corrosion Protection: A phosphating and zinc passivation treatment is applied to the surface. In a damp, slightly corrosive power plant atmosphere, it resists rust. After a full maintenance cycle (typically 1-2 years), the stud should unthread easily, without needing to be hammered or forced out.
V. When to Use It: Three Key Scenarios
1. New Installations:
When building a new unit or assembling the FA1D56 pump for the first time, don't try to save a few dollars with standard fasteners. Use the FA1D56-03-19 stud with the specified matching nuts and washers right from the start. This eliminates the sealing hazard immediately.
2. Scheduled Overhauls:
During the 1-2 year maintenance check, if the FA1D56-03-19 stud has been in service for over two years, it's wise to replace it, even if it looks fine. All metals experience fatigue. There might be internal micro-cracks you can't see, risking a catastrophic failure later.
3. Emergency Repairs:
If the cover leaks and the cause is a broken or stripped stud, do not use a random bolt as a temporary fix. Keep several FA1D56-03-19 studs in your spares inventory. Having the right part on hand means the repair can be done in 1-2 hours, avoiding long delays waiting for the supplier to arrange a new shipment.
A Final Tip for Mechanics:
When you order the FA1D56-03-19 studs, try to get the matching nuts and washers from the same reputable supplier Dongfang SRI at the same time. Minor differences in sizing from different manufacturers can still cause a small leak. Always check the model numbers against your FA1D56 specifications when the parts arrive.
There are also other model numbers that may assit your pump overhaul:
Rubber o-ring DG750-180-M-01(4)
oil seal HPT300-340-05-01A-00
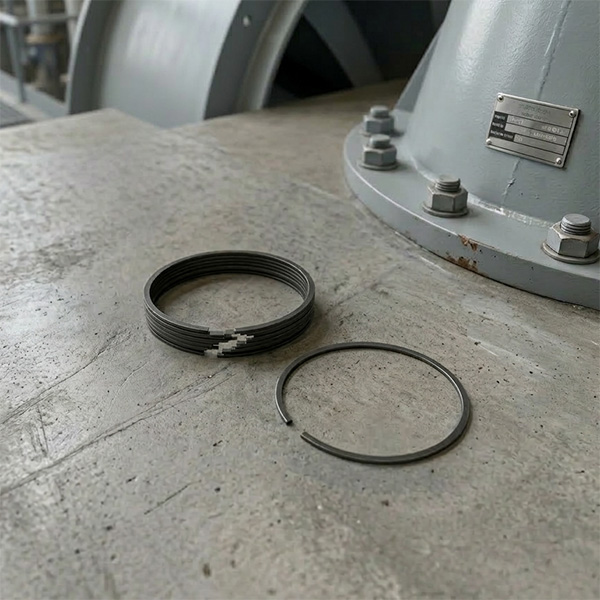
sealing ring HTHP-01-02-17-01
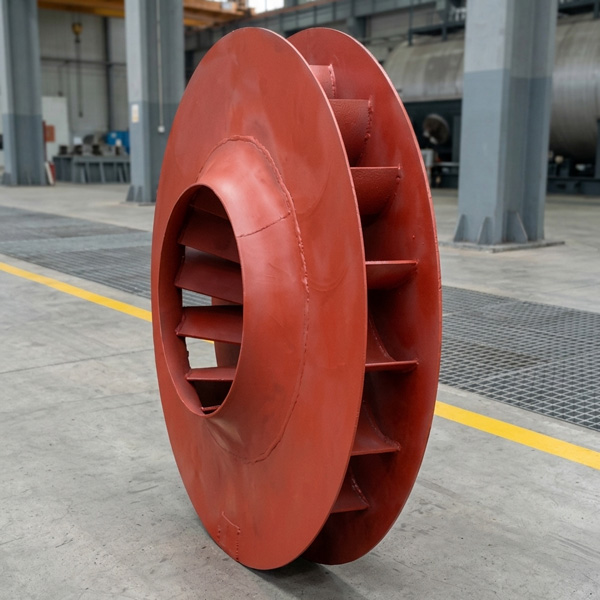
impeller FA1D56-01-09
double-ended bolt FA1D53-M24x175
Wheel clamp ring HPT300-340-6S 27A
gasket ZB253-640-03-07
oil baffle ring FA1B56-A2-102761
First stage impeller HPT300-340-03-14
bushing HZB253-640-01-13
Often, a leaking pump cover isn't a major failure—it's just a small fastener that was installed incorrectly or mismatched. Getting these minor details right will keep your pump running smoothly, saving you significant time and worry on the floor.
HKCYT-2025-11-05


-
Looking at Abnormal Wear on U250-Y01 Induced Draft Fan Moving Blades
Understand why U250-Y01 induced draft fan blades wear out and how to maintain mechanical linkages. We provide U250-Y01 blades, seals, and connecting rods.03-23
-
Easy Maintenance with the SDGLQ-60T-36K Duplex Oil Filter for Coal Mills
Learn how to switch the SDGLQ-60T-36K duplex filter element without stopping your coal mill. No oil flow interruption, stable pressure, and zero bypass. Get a quote today.03-17
-
Keeping Your ID Fan Safe with the U2616G2106Y01 Blade Seal Ring
Protect your HU25042-221G fan with the U2616G2106Y01 blade seal ring. Learn how multi-stage sealing prevents bearing jams, blade sticking, and fan stalls.03-12
-
Stopping Oil Leaks with the UYG35/20G010 ID Fan Seal Ring
Stop bearing box leaks with the UYG35/20G010 ID fan seal ring. Learn how gap control and thermal expansion prevent grip failure in induced draft fan spare parts.03-11
-

How to Detect Micro Leakage in Feed Water Pump Gasket FA1D56-03-09 Before It Causes Shutdown
Learn the common failure modes of feed water pump cooling water jacket sealing gasket FA1D56-03-09, including aging, creep relaxation, and mechanical damage. Understand external signs, micro leakage detection methods, and practical maintenance tips to prevent pump shutdown and reduce repair cost.03-02


