


Don't Forget to Check FA1D56-03-13 Stud Bolt When Booster Pump Casing Cover Leaks
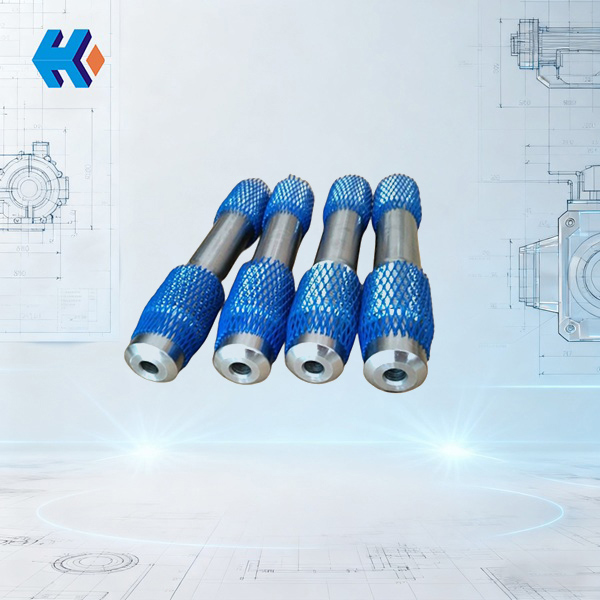
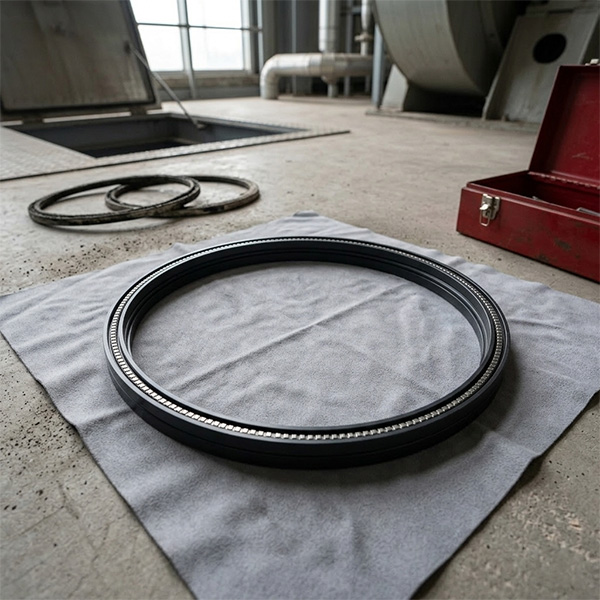
Many power plant technicians have dealt with the frustration of breaking or stripping a stud bolt when disassembling the booster pump casing cover, only to have the cover start leaking fluid again soon after reassembly. The problem often lies with an unassuming component: the FA1D56-03-13 Booster Pump Casing Cover Double-End Stud Bolt. This long bolt, specifically designed for the FA1D56 pump, looks simple, but it is crucial for securely locking the casing cover to the pump body and preventing seal failure.
This article explains why this stud bolt is so important and how to handle it during maintenance.
I. Understanding the Role of This Stud Bolt
The FA1D56-03-13 is not a standard bolt; it is a custom-designed double-end stud for the FA1D56 booster pump. It has threads on both ends: one end screws into the pump body, and the other secures the casing cover with a nut. Its core functions are twofold:
- "Secure Locking": It firmly connects the booster pump casing cover to the pump body. Regardless of the internal fluid pressure or rotation speed, the stud ensures the cover remains stable, preventing leakage through the gaps.
- "Sealing Support": It provides the "framework" for internal sealing components (like the mechanical seal LTJ-8B1D-FA1D56). The seal can only function effectively if the stud bolt applies sufficient compression to the casing cover, allowing the seal components to adhere tightly to the sealing face.
Case Study: One power plant tried to save time by substituting a common carbon steel stud. Within three months of operation, the stud was "stretched and elongated" by the internal pump pressure, the casing cover loosened, and fluid leaked. Examination showed the common stud was slightly deformed. This highlights the importance of using the dedicated stud: it is engineered to withstand the specific pressure and vibration characteristics of the FA1D56 booster pump.
II. Why is This Stud So Robust? Three Key Design Points
The FA1D56-03-13 bolt's ability to "handle the job" in a power station relies on its technical design:
1. Optimal Material Selection: 40Cr Steel—Hardness Meets Toughness
This stud uses 40Cr alloy structural steel, not common steel. The steel undergoes quenching followed by high-temperature tempering (known as "quenched and tempered treatment" or Q&T), making it act like "steel-reinforced concrete"—both hard and tough. It is highly resistant to breaking under tension (tensile strength is over 50% higher than ordinary carbon steel) and resistant to bending. Even if internal pump pressure occasionally exceeds the limit, the stud won't snap.
Furthermore, it is high-temperature resistant. When the booster pump runs, the area around the casing cover gets hot. A standard bolt might soften and loosen, but the 40Cr steel remains stable, preventing thermal-induced failure.
2. Detailed Manufacturing Process: Rolled Threads for Durability and Anti-Rust
The threads of standard bolts are "cut" (machined), often creating tiny stress cracks at the root that can lead to failure over time. The threads on this stud are "rolled"—a process that presses the pattern into the metal, resulting in stronger, smoother threads that prevent galling during installation.
The surface is also treated with phosphating, providing a protective, anti-rust coating. In a power station environment with high humidity and oil contamination, this protection prevents rust, extending the stud's service life by 60% compared to untreated studs, closely matching the lifespan of the mechanical seal and reducing frequent replacements.
3. Strict Quality Control: Checking Every Step from Raw Steel to Finish
Reputable suppliers, such as DONGFANG SRI, maintain rigorous quality control starting with the raw steel—the material must have a qualification certificate, and its composition must be sampled and verified. Heat treatment is controlled by computer to ensure zero deviation. Finished studs are inspected for thread accuracy and cracks, and even test-fitted on a simulated pump to ensure a perfect match with the FA1D56 casing cover and nut, preventing installation issues or insufficient tightening.
III. How to Use During Maintenance: Three Scenarios
The FA1D56-03-13 stud is frequently involved in maintenance. Usage differs across scenarios, so technicians should note these points:
1. New Unit Installation: Torque Symmetrically, Don't Rush
Stud bolts must not be randomly tightened during new pump installation. First, clean the stud and the cover holes. Then, use the "symmetrical, multi-step tightening" method:
- First, lightly tighten all studs to 100 N·m (approximately hand-tight).
- Then, increase the torque in three stages to a final value of 400 N·m (using a torque wrench).
- After each step, visually check that the studs are straight and not warped.
The sequence is also important: The studs must only be tightened after the pump shaft sleeve FA1D56-01-06 is installed. If the shaft sleeve is not correctly positioned, tightening the studs might damage other components.
2. Routine Overhaul: Three Checks and One Replacement—No Shortcuts
The stud bolt must be thoroughly inspected every 12,000 hours of operation (roughly once a year):
- Check Threads: If the thread profile is worn down by more than one-third, or if the threads are visibly distorted, replace the stud immediately.
- Internal Inspection: Use ultrasonic flaw detection to check for internal cracks (even cracks as small as 2 mm can be detected).
- Measure Length: If the stud is 0.1% longer than a new one (e.g., 1 mm longer for a 1 meter stud), it has been stretched and must be replaced.
Additionally, if the Centrifugal Pump Bearing FA1D67-02-03 is worn out, causing excessive vibration, the stud must be carefully inspected to ensure it hasn't shaken loose.
3. Emergency Repair: Fast Replacement, Quick Torque—Time is Critical
If the casing cover is leaking, you must check the stud bolt in addition to replacing the mechanical seal: a stud that won't turn might be stripped; one that feels loose might be broken. Both require immediate replacement, ideally completed within two hours to minimize impact on power generation. When replacing, remember to clean the cover flange face—a deformed flange face will prevent the new stud from being tightened securely.
IV. Stud Bolt "Essential Partners" List: Do Not Use Alone
The FA1D56-03-13 stud cannot work alone; it must be paired with the following components. Technicians should stock these parts together:
| No. | Part Model | Part Name | Synergy with Stud Bolt | Important Note |
|---|---|---|---|---|
| 1 | FA1D56-03-14 | Casing Cover Hex Nut | Screwed onto the stud to compress the casing cover. Must be torqued to standard using a wrench. | Do not substitute with common nuts; thread stripping may occur. |
| 2 | FA1D56-03-21/24 | Copper Gasket / Plain Washer | Placed between the nut and the cover to prevent the nut from damaging the cover. | It is best practice to replace washers during every overhaul. |
| 3 | LTJ-8B1D-FA1D56 | Mechanical Seal | The stud applies pressure to the seal once the cover is tightened, preventing leakage. | The seal will leak if the stud is not sufficiently tightened. |
| 4 | FA1D56-01-06 | Pump Shaft Sleeve | Positions the pump shaft. The stud must be tightened only after the sleeve is secured. | A misaligned sleeve will affect the force distribution on the stud. |
| 5 | FA1D67-02-03 | Centrifugal Pump Bearing | Reduces pump vibration, preventing the stud from shaking loose. | If the bearing fails, the stud must be checked simultaneously. |
Final Practical Advice
Do not underestimate the FA1D56-03-13 stud bolt. It is the "lock" of the booster pump; if it is not secure, the entire pump is vulnerable to failure. Always purchase from a reputable supplier, such as DONGFANG SRI, and avoid cheaper, non-specialized alternatives—saving a small amount of money can lead to a major incident. Follow the correct inspection and installation procedures during maintenance, and this stud will help you prevent many problems and ensure the booster pump runs smoothly.
HKCYT-2025-10-30


-
Looking at Abnormal Wear on U250-Y01 Induced Draft Fan Moving Blades
Understand why U250-Y01 induced draft fan blades wear out and how to maintain mechanical linkages. We provide U250-Y01 blades, seals, and connecting rods.03-23
-
Easy Maintenance with the SDGLQ-60T-36K Duplex Oil Filter for Coal Mills
Learn how to switch the SDGLQ-60T-36K duplex filter element without stopping your coal mill. No oil flow interruption, stable pressure, and zero bypass. Get a quote today.03-17
-
Keeping Your ID Fan Safe with the U2616G2106Y01 Blade Seal Ring
Protect your HU25042-221G fan with the U2616G2106Y01 blade seal ring. Learn how multi-stage sealing prevents bearing jams, blade sticking, and fan stalls.03-12
-
Stopping Oil Leaks with the UYG35/20G010 ID Fan Seal Ring
Stop bearing box leaks with the UYG35/20G010 ID fan seal ring. Learn how gap control and thermal expansion prevent grip failure in induced draft fan spare parts.03-11
-

How to Detect Micro Leakage in Feed Water Pump Gasket FA1D56-03-09 Before It Causes Shutdown
Learn the common failure modes of feed water pump cooling water jacket sealing gasket FA1D56-03-09, including aging, creep relaxation, and mechanical damage. Understand external signs, micro leakage detection methods, and practical maintenance tips to prevent pump shutdown and reduce repair cost.03-02


