


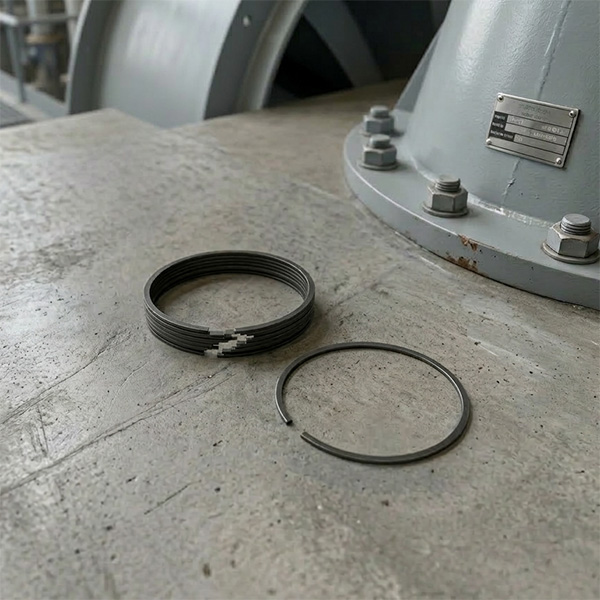
Field Guide: Troubleshooting and Installation for the FA1D56 High-Pressure Gasket
Let's address common practical issues encountered by engineers during FA1D56 booster pump maintenance. By focusing on the performance and fitment requirements of the FA1D56-02-04 High-Pressure Gasket, we provide clear answers to three core technical questions, complete with essential tips for associated component alignment, serving as a handy reference for on-site overhauls.
Q1: When installing the FA1D56-02-04 High-Pressure Gasket, which FA1D56 booster pump components require precise cooperation? What are the critical assembly tips?
A: The sealing effectiveness of the FA1D56-02-04 gasket totally relies on precise coordination with its neighboring parts. The key associated components and their fitment requirements are detailed below. Engineers must prioritize dimensional matching and proper assembly techniques to prevent medium leakage caused by alignment errors.
| Component Model | Component Name | Gasket Interaction with FA1D56-02-04 | Key Assembly Note |
|---|---|---|---|
| FA1D56-02 | Booster Pump End Cap | Provides gasket compression force, forms the seal chamber between the end cap and the cooling water chamber | End cap seal face must be free of scratches (depth ≤ 0.1 mm); otherwise, it needs grinding/repair. |
| FA1D56-003 | Cooling Water Chamber | Clamps the gasket with the end cap, isolating potential cross-flow between the cooling medium and the pump medium | Cooling water chamber seal groove must be clean and free of debris to prevent indentations on the gasket surface. |
| FA1D56-01 | Bearing Housing | Locates the gasket's radial position, ensuring the gasket bore aligns with the bearing housing mounting holes | The concentricity between the bearing housing and end cap must be ≤ 0.03 mm to prevent uneven force on the gasket. |
| FA1D56-01-07 | Mechanical Seal Sleeve | Keeps the gasket from touching the pump shaft directly, reducing friction wear | Sleeve outer diameter runout must be ≤ 0.02 mm to prevent rubbing/scuffing the gasket during operation. |
| FA1D56-01-03A | Booster Pump Shaft | Indirectly locates the gasket via the sleeve, ensuring the seal center is concentric with the pump shaft | Pump shaft radial runout must be ≤ 0.01 mm to avoid eccentricity leading to localized pressure on the gasket. |
Critical Assembly Tips:
- Seal Face Cleaning: Before installation, use anhydrous ethanol to wipe clean the sealing faces of the end cap and cooling water chamber. Remove oil, rust, and metal filings. Failing this will lead to localized gasket deformation and a hidden leak risk.
- Bolt Torque Control: Follow the FA1D56 booster pump maintenance manual. Use a diagonal, multi-stage tightening procedure (recommended torque
80–100 N·m). This prevents excessive localized compressive stress that could crack the gasket. - Gap Check: After assembly, use a feeler gauge to check the fitment gap between the end cap and the cooling water chamber. Ensure the gap is
≤ 0.05 mmand evenly distributed. If the gap is too big, the bearing housing position must be readjusted.
Q2: If the FA1D56 booster pump's localized temperature exceeds 120 degrees Celsius during operation, will the FA1D56-02-04 High-Pressure Gasket fail immediately? How should engineers troubleshoot and handle this?
A: It won't fail right away, but long-term overheating will speed up gasket degradation. You need to check the duration of the over-temperature event and the condition of associated parts to decide what to do, as follows:
First, understand the gasket's heat resistance: its core material is thin blue electrical insulating pressboard (or "fishpaper"). Its continuous operating temperature is ≤ 120°C, reaching a B-class thermal rating (short-term temperature resistance ≤ 130°C, for no more than 2 hours). If the over-temperature is only short-term (like 1–2 hours) and localized (120–130°C), and the temperature drops back to normal later, the gasket won't leak instantly, but checking the cause of the over-temperature is critical. If the over-temperature lasts longer than 2 hours or the temperature goes above 130°C, the fishpaper will start to carbonize and harden, reducing its ability to conform to the seal face, and medium seepage may appear within 3–5 days.
On-Site Troubleshooting and Handling Steps:
- Check Gasket Status After Shutdown: After dismantling the end cap, check the gasket for signs of carbonization (surface yellowing, brittleness). If found, it must be replaced. Also, inspect cooperating parts—like the mechanical seal sleeve FA1D56-01-07 for high-temperature wear (scratches on the outer diameter) and the pump shaft FA1D56-01-03A for excessive radial runout (which can cause localized friction heating).
- Find the Root Cause of Over-Temperature: Focus on the cooling water circuit of the cooling water chamber FA1D56-003. Check if the passage is blocked (use compressed air to clear it); insufficient cooling will raise the temperature around the gasket. Also, if the impeller FA1D56B-03 is worn, it can cause medium recirculation and friction heating inside the pump, indirectly heating the gasket.
- Replacement and Prevention: If the gasket is carbonized or the root cause of the over-temperature hasn't been fixed, you must replace the old FA1D56-02-04 gasket and simultaneously fix the cooling water issue or the impeller problem. It's smart to install temperature monitoring points around the gasket area to track operating temperature in real-time and prevent future over-temperature events.
Q3: Why is it mandatory to replace the FA1D56-02-04 High-Pressure Gasket during a major overhaul of the FA1D56 booster pump? Can the old gasket be reused if it looks fine?
A: Replacement is mandatory during a major overhaul; reusing the old gasket, even if it looks okay, is a bad idea. The main reasons relate to the major overhaul process, the gasket's performance degradation, and the status of associated parts:
- Dismantling Causes Irreversible Damage to Sealing Performance: A major overhaul involves taking apart the end cap FA1D56-02, the cooling water chamber FA1D56-003, and sometimes even the impeller FA1D56B-03 and thrust disc FA1B56-A2-102779. During this process, the gasket loses its "elastic memory" due to the end cap removal. The compressed deformation of the fishpaper material cannot be fully recovered after being disassembled. When reinstalled, it won't tightly conform to the seal face. Even if bolt torque is standard, a tiny gap of
0.01–0.02 mmwill remain, creating a potential leakage path for the medium. One plant tried reusing an old gasket and saw cross-flow between the cooling water and the pump medium just 3 months after the overhaul. They had to shut down and replace it with a new gasket to finally solve the issue. - Old Gasket Performance Degrades Over Operating Cycle: During normal operation, the gasket constantly handles about
10 MPaof pressure and temperatures between80–100°C. Even if the appearance isn't visibly damaged, the fibrous structure of the fishpaper ages, and its resistance to compression and deformation drops (compression set increases from an initial ≤ 5% to over 8%). It simply cannot meet the demands of the long-term running cycle required after a major overhaul. - New Parts Need a New Gasket Fit: During the overhaul, components like the bearing housing FA1D56-01 and mechanical seal sleeve FA1D56-01-07 are repaired or replaced. The dimensional accuracy of these parts might subtly change (e.g., the flatness error of the bearing housing seal face is reduced after repair). Reusing the old gasket won't match the new dimensional status, potentially causing seal failure due to improper fitment clearance.
Therefore, as required by the FA1D56 booster pump maintenance manual, the high-pressure gasket FA1D56-02-04 must be replaced along with other consumables (like O-rings and general gaskets) during a major overhaul. This ensures the best possible fit with the repaired end cap, cooling water chamber, and bearing housing, guaranteeing stable operation for the next 18 months or more.
HKCYT-2025-10-28


-
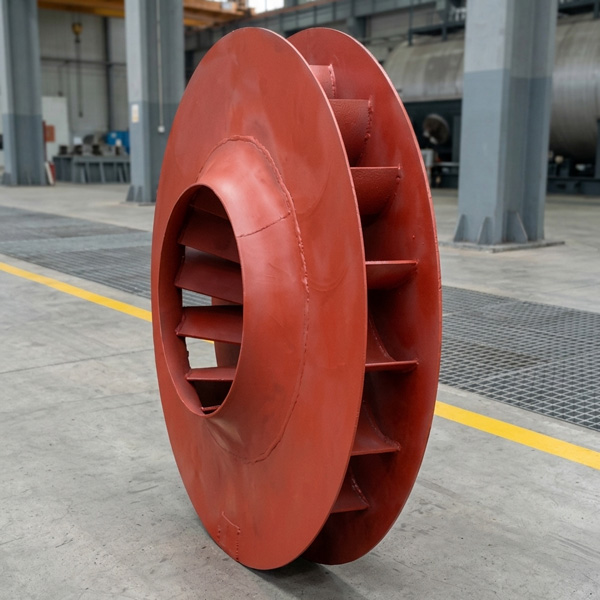
Looking at Abnormal Wear on U250-Y01 Induced Draft Fan Moving Blades
Understand why U250-Y01 induced draft fan blades wear out and how to maintain mechanical linkages. We provide U250-Y01 blades, seals, and connecting rods.03-23
-
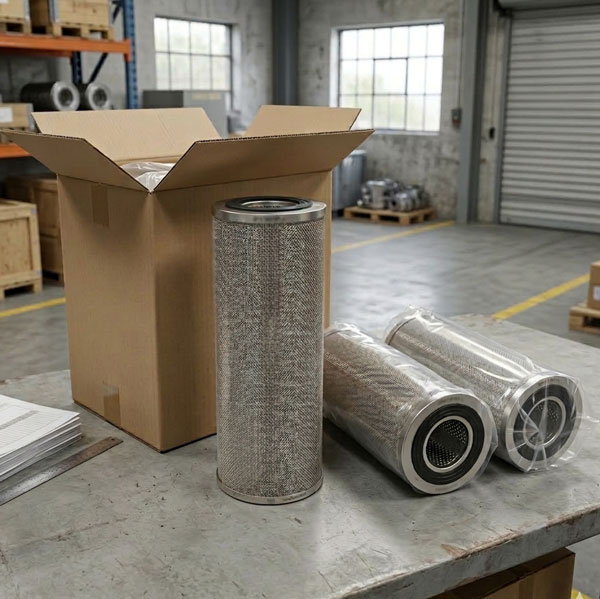
Easy Maintenance with the SDGLQ-60T-36K Duplex Oil Filter for Coal Mills
Learn how to switch the SDGLQ-60T-36K duplex filter element without stopping your coal mill. No oil flow interruption, stable pressure, and zero bypass. Get a quote today.03-17
-
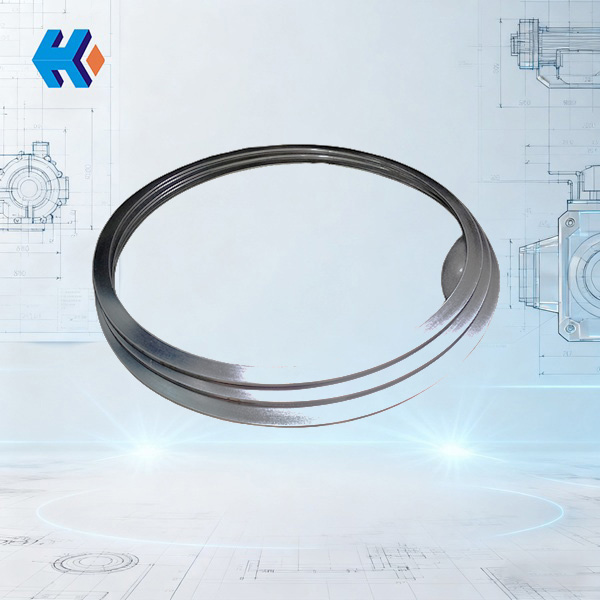
Keeping Your ID Fan Safe with the U2616G2106Y01 Blade Seal Ring
Protect your HU25042-221G fan with the U2616G2106Y01 blade seal ring. Learn how multi-stage sealing prevents bearing jams, blade sticking, and fan stalls.03-12
-
Stopping Oil Leaks with the UYG35/20G010 ID Fan Seal Ring
Stop bearing box leaks with the UYG35/20G010 ID fan seal ring. Learn how gap control and thermal expansion prevent grip failure in induced draft fan spare parts.03-11
-

How to Detect Micro Leakage in Feed Water Pump Gasket FA1D56-03-09 Before It Causes Shutdown
Learn the common failure modes of feed water pump cooling water jacket sealing gasket FA1D56-03-09, including aging, creep relaxation, and mechanical damage. Understand external signs, micro leakage detection methods, and practical maintenance tips to prevent pump shutdown and reduce repair cost.03-02


